Accessing the VMware vCloud Control Panel
Once you have received your access credentials, proceed to the following URL: https://vcd.cloud4u.com/tenant/NameOfYourDatacenter/
Enter your username and password to log in.

Creating a Virtual Machine
Virtual machines are created within a group, known as a vApp. This allows you to manage the startup/shutdown order and timing for multiple machines.
-
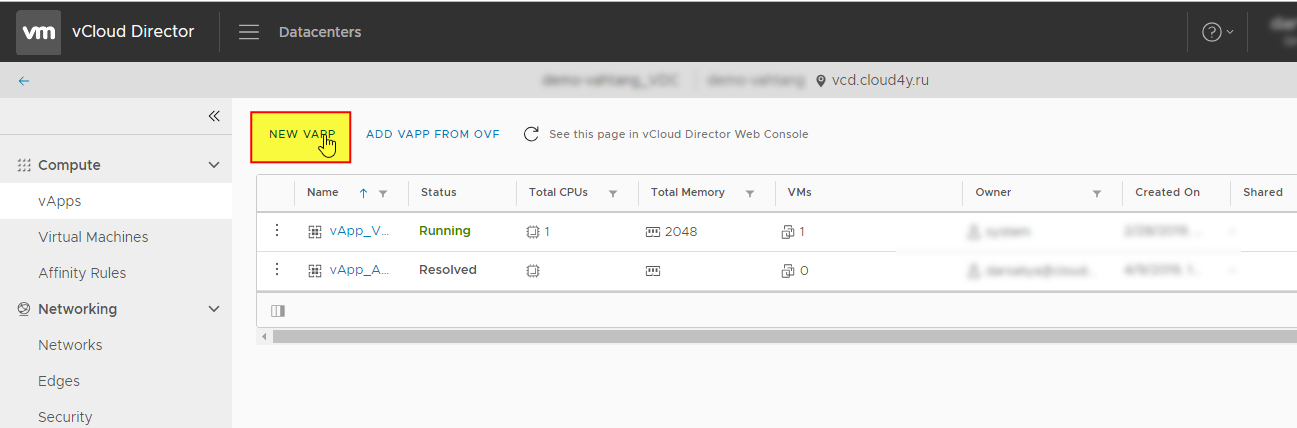
Create a New vApp: Click the "New vApp" button.
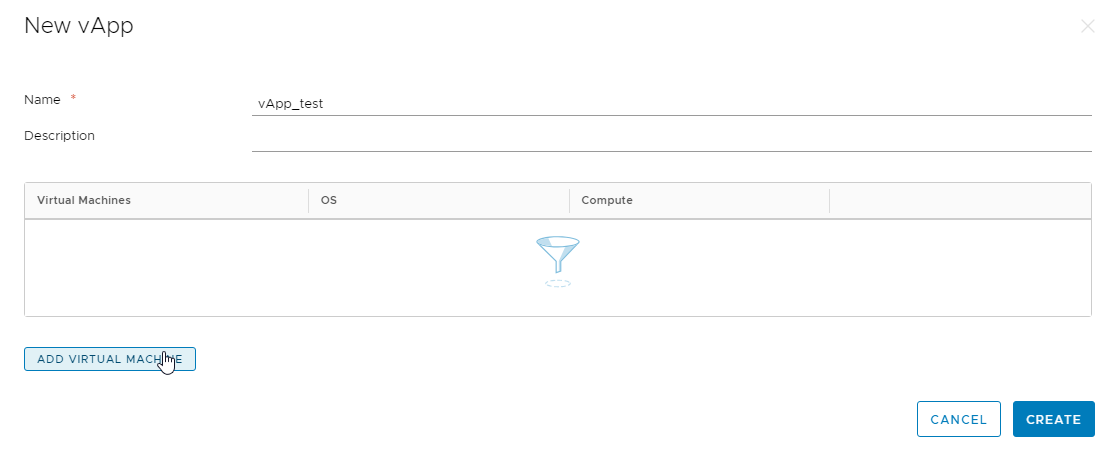
2. Name Your vApp: In the window that opens, enter a name for your vApp and click "ADD VIRTUAL MACHINE."
Configuring the Virtual Machine
You will now configure your first virtual machine within the vApp.
-
To create from a template: Please follow the dedicated template installation guide.
-
To create from an ISO image: Select "New" from the Type dropdown menu.
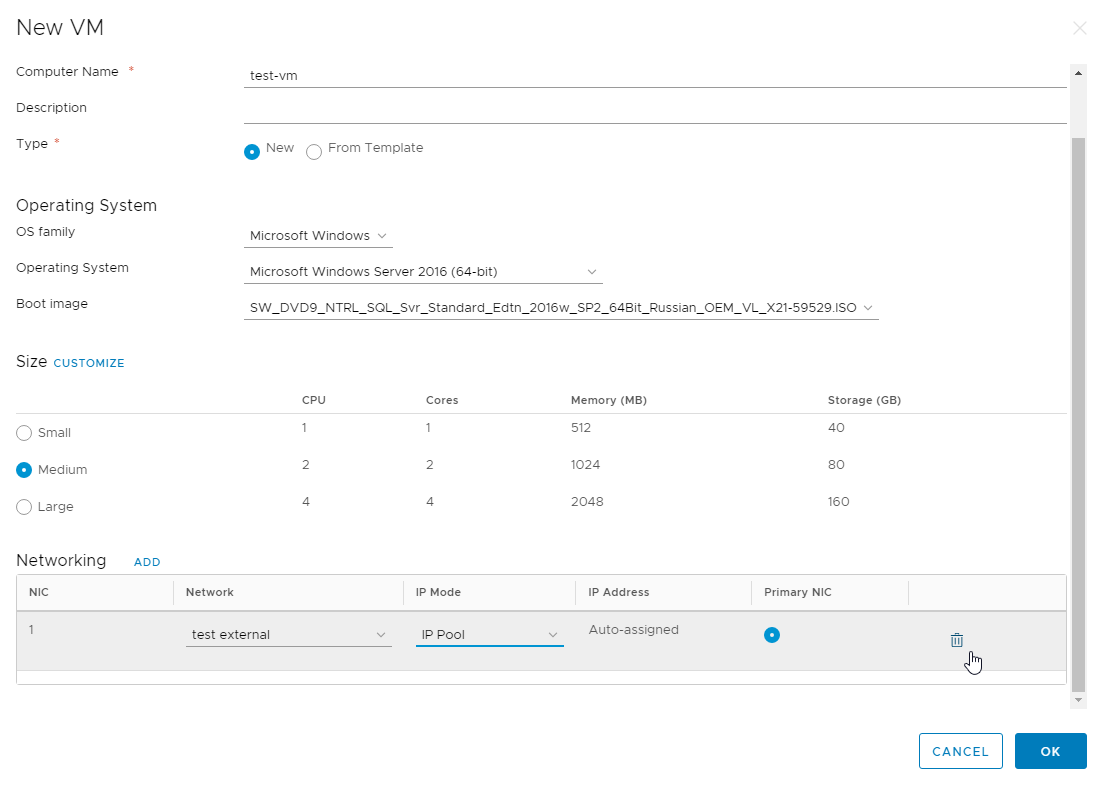
The virtual machine creation window will appear. Here you can configure:
-
Operating System Type
-
CD/DVD-ROM Connection (to select your boot image)
-
Recommended Configuration (e.g., Small, Medium, Large)
After specifying your settings, click OK.
Tip: For granular control over CPU, RAM, and other resources, use the "CUSTOMIZE" option.
To add more machines to this vApp, simply repeat the process by clicking 'ADD VIRTUAL MACHINE'.
Network and Power-On Setup
-
Configure Networking: Navigate to the "Networking" tab to connect your virtual machine's network adapters to the appropriate networks. For detailed instructions, please refer to the Network Setup guide.
-
Power On the Virtual Machine:
-
Go to the "Virtual Machines" menu.
-
Select your target virtual machine.
-
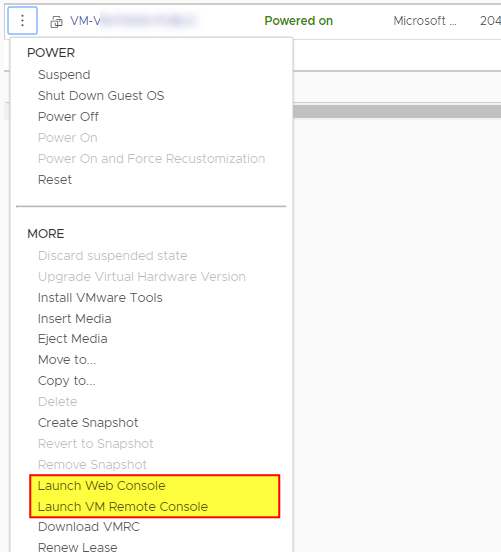
From the actions menu, choose "Power On."
-
-
Access the Console:
-
Once the machine is powered on, select your preferred console type from the same actions menu: "Launch Web Console" or "Launch VM Remote Console.
-
You may now proceed with the operating system installation according to its specific documentation.
